Sat Feb 02 2019
AWS: Hosting a static web-app on a custom domain with AWS S3 and Cloudflare
This is a step by step guide on hosting a static web-app on Amazon S3 and exposing it using a custom (https) domain through Cloudflare.
This article assumes some prior knowledge of both Amazon S3 and Cloudflare.
The example web-app used in the article will be hosted using a subdomain, however, the same approach will work for root domains as well.
About Amazon S3 and Cloudflare
If you are familiar with both S3 and Cloudflare you can skip this section.
Amazon S3 is a hosted storage service which allows you to upload files and configure permissions for these files. S3 also allows a so called bucket (a container for files) to be used as a static web hosting service. You can read more about Amazon S3 by visiting their site. https://aws.amazon.com/s3/
Cloudflare is a service which offers CDN, DNS and many other products. We'll be using it for its DNS product in this article. Read more about Cloudflare on their own site. https://www.cloudflare.com
Setting up a basic web-app
The first step is to create the code for a web app. For this example, I'll be using a simple «index.html» file which prints "An example web app …..". The only thing to note here is that you do need an «index» file to act as the entry point / root for your web-app.
The example web-app is be hosted at https://web-app-test.kinderas.com.
Configuring Amazon S3
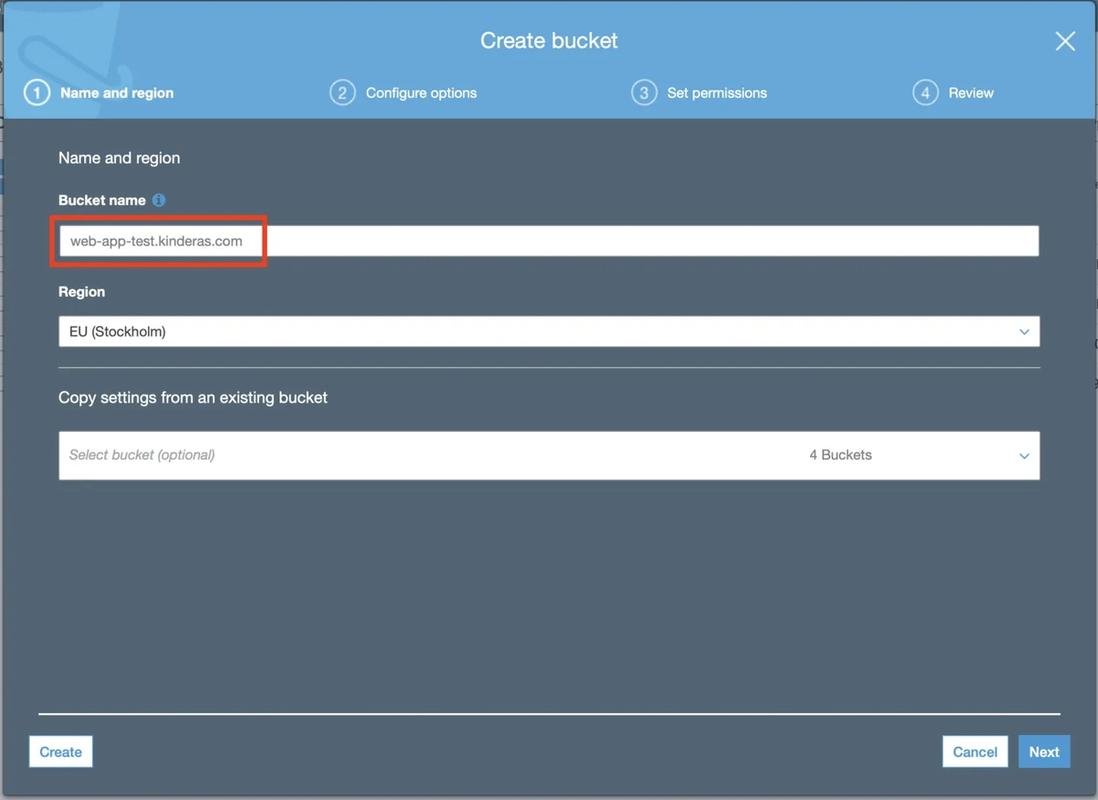
Log in to the AWS console and navigate to the S3 service. Here you'll want to create a new bucket with the same name as the URL for your web app. It's important that the name of the bucket matches the name of the URL exactly, without the protocol (HTTP(s)), since S3 uses the bucket name for routing.
The example URL is web-app-test.kinderas.com, so we'll create a bucket with that name. Choose a region and click next and then next again.
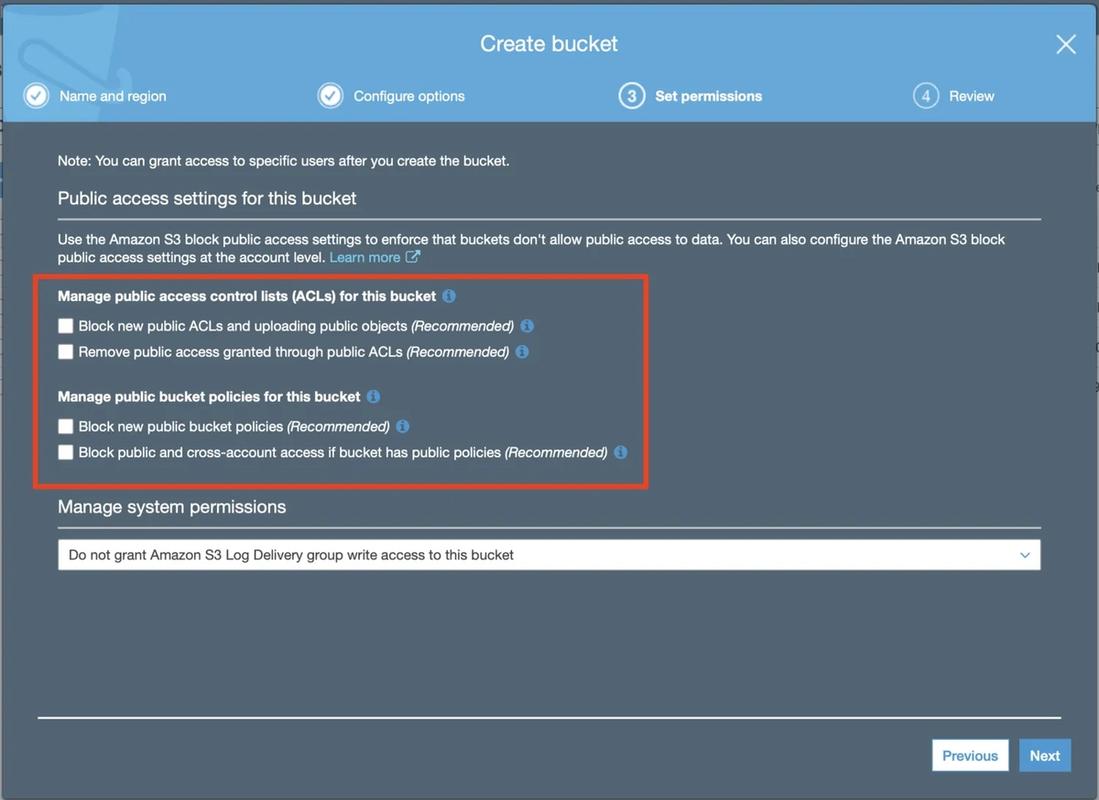
On the third screen for the bucket creation wizard, uncheck the boxes under «Manage public Access control lists (ACLs) for selected buckets». If you forget this you can do it later by selecting the bucket and clicking the «Edit public access setting» button on the overview page.
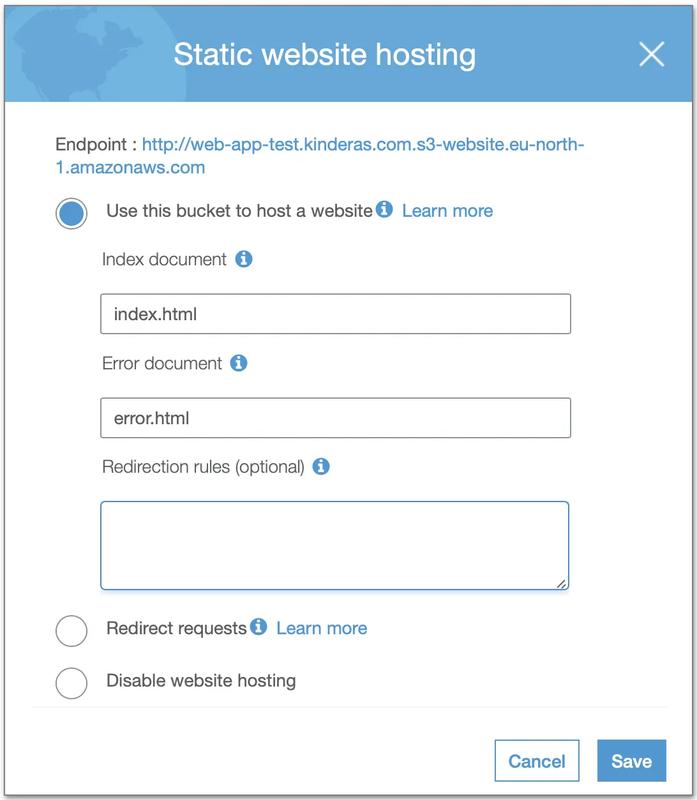
In order to have S3 use this bucket for website hosting, we need to configure a couple of things. Click on the name of the bucket and select the «Properties» tab on the top. Find the «Static website hosting» tile and click it. For the «index document» enter the filename of the entry point file, in this example, this is called «index.html». You can also upload a file which is used for errors.
Note the «Endpoint» URL at the top of the dialog. We'll need this URL for testing and for configuring the domain in Cloudflare.
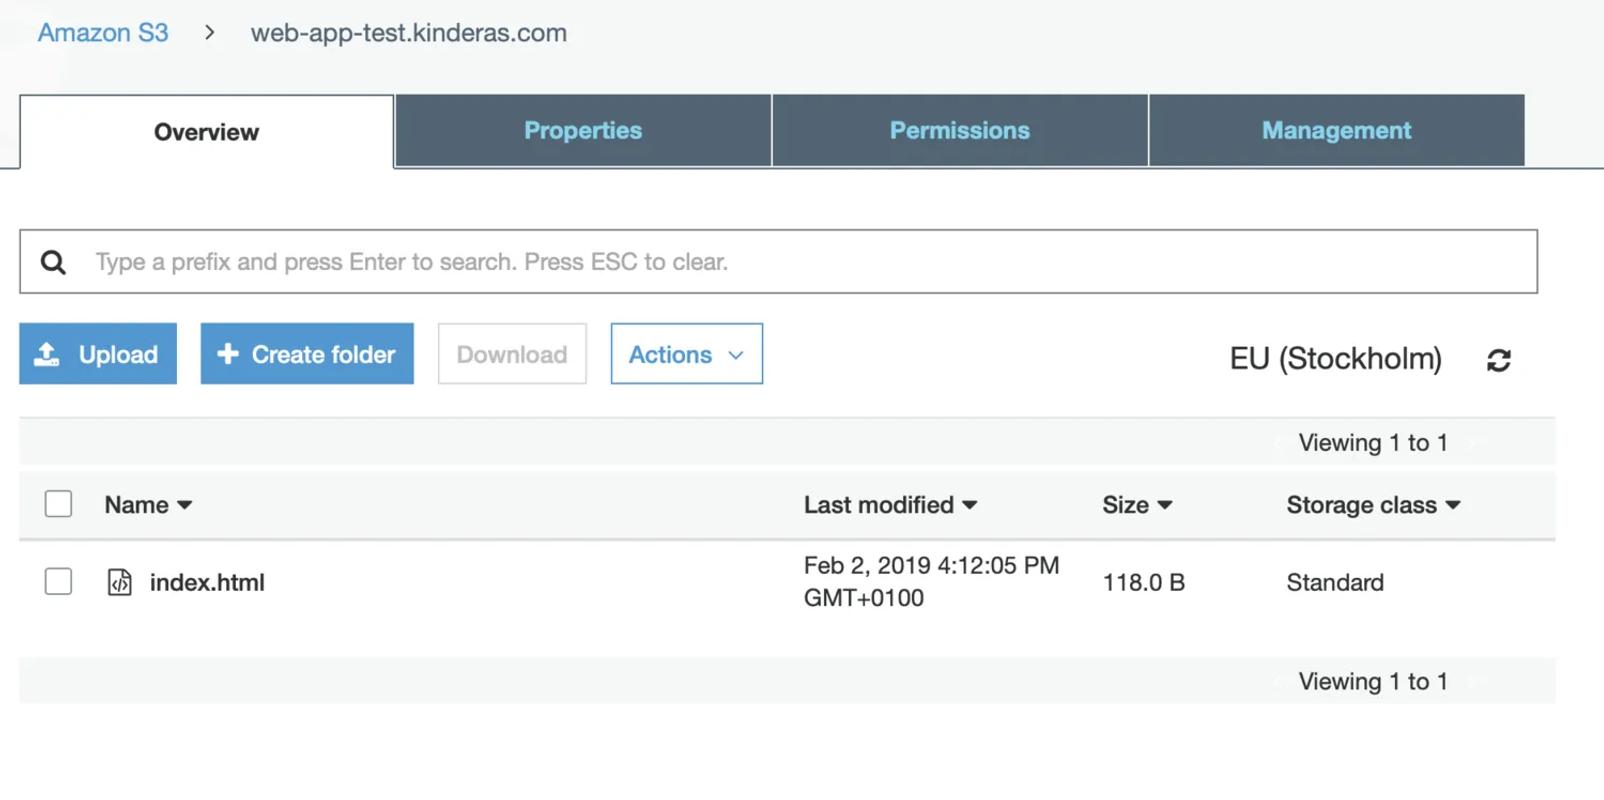
Now we need to upload our web-app to have something to use for testing. Select the «Overview» tab in your bucket and upload your app, making sure that the «index.html» file is at the root of the bucket.
The web-app will not work just yet. If you visit the endpoint URL from the static website dialog it will just give you a permission error. To make it work we'll need to allow access to the bucket from the outside world.
Select the «Permissions» tab from the top of the bucket settings and then select the «Bucket policy» tab. You should now see the «Bucket policy editor». First We’ll create a simple policy to verify that the basic are working. Paste the JSON below into the editor and do notice the «YOUR BUCKET NAME HERE» part, replace that part with your bucket name. See the image below for a full example using the name from the example web-app.
{
	"Version": "2012-10-17",
	"Statement": [
		{
			"Sid": "PublicReadGetObject",
			"Effect": "Allow",
			"Principal": "*",
			"Action": "s3:GetObject",
			"Resource": "arn:aws:s3:::YOUR BUCKET NAME HERE/*"
		}
	]
}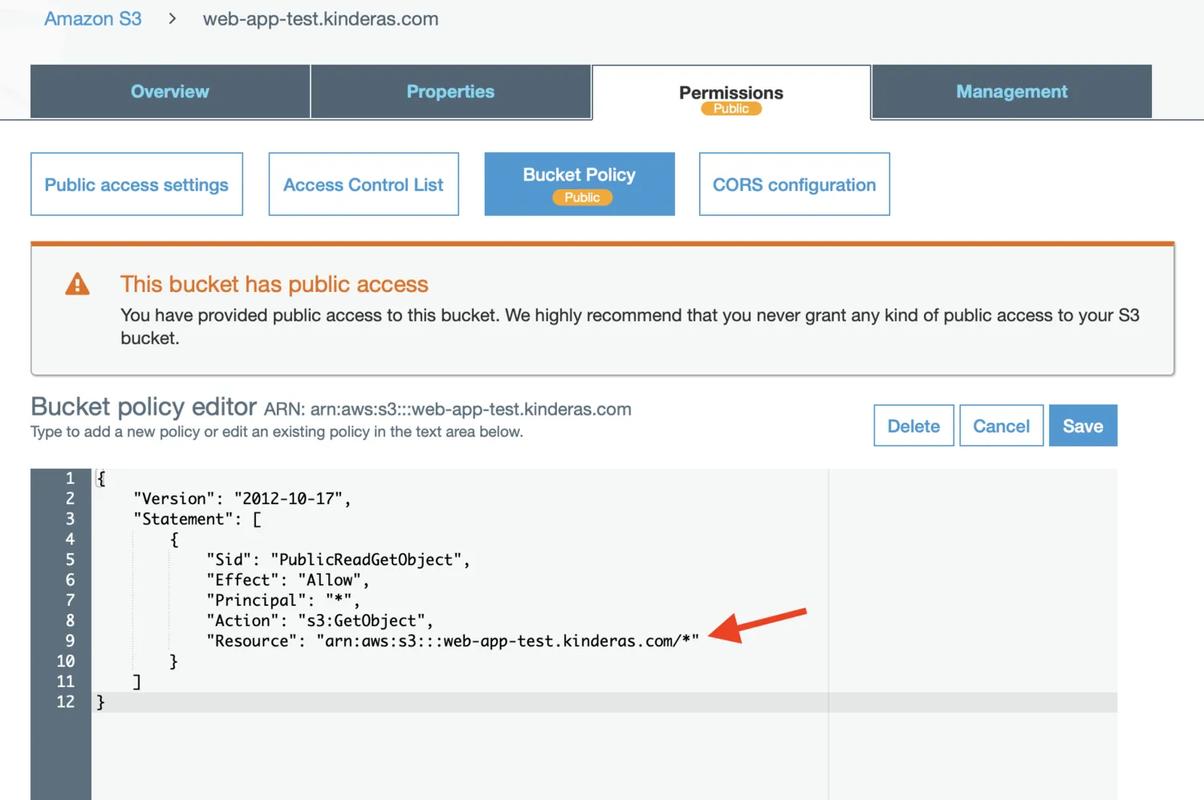
The policy above grants public access to anybody wanting to visit your web-app at the S3 generated URL. If this is all you want, then you are done. However, if you want to use browser features dependent on https you'll want to read on.
Next, we'll modify the permissions to only allow traffic from Cloudflare. We'll do this by adding a condition to the policy stating that only IP addresses from Cloudflare should be able to access the bucket.
The new full policy looks like this (below). Notice the «YOUR BUCKET NAME HERE» on line 9. You know what to do. Update it, save it. You will no longer be able to access the bucket from the S3 URL. Moving on to the Cloudflare setup below the policy gist. In the gist we are whitelisting the Cloudflare URLs found here: https://www.cloudflare.com/ips/
Configuring Cloudflare
Important note about security! Configuring Cloudflare to expose your web-app on an https URL does not mean that the traffic from Cloudflare to the S3 bucket is encrypted. It only implies to the browser that the web-app is hosted on an https server, allowing certain features which would otherwise be unavailable.
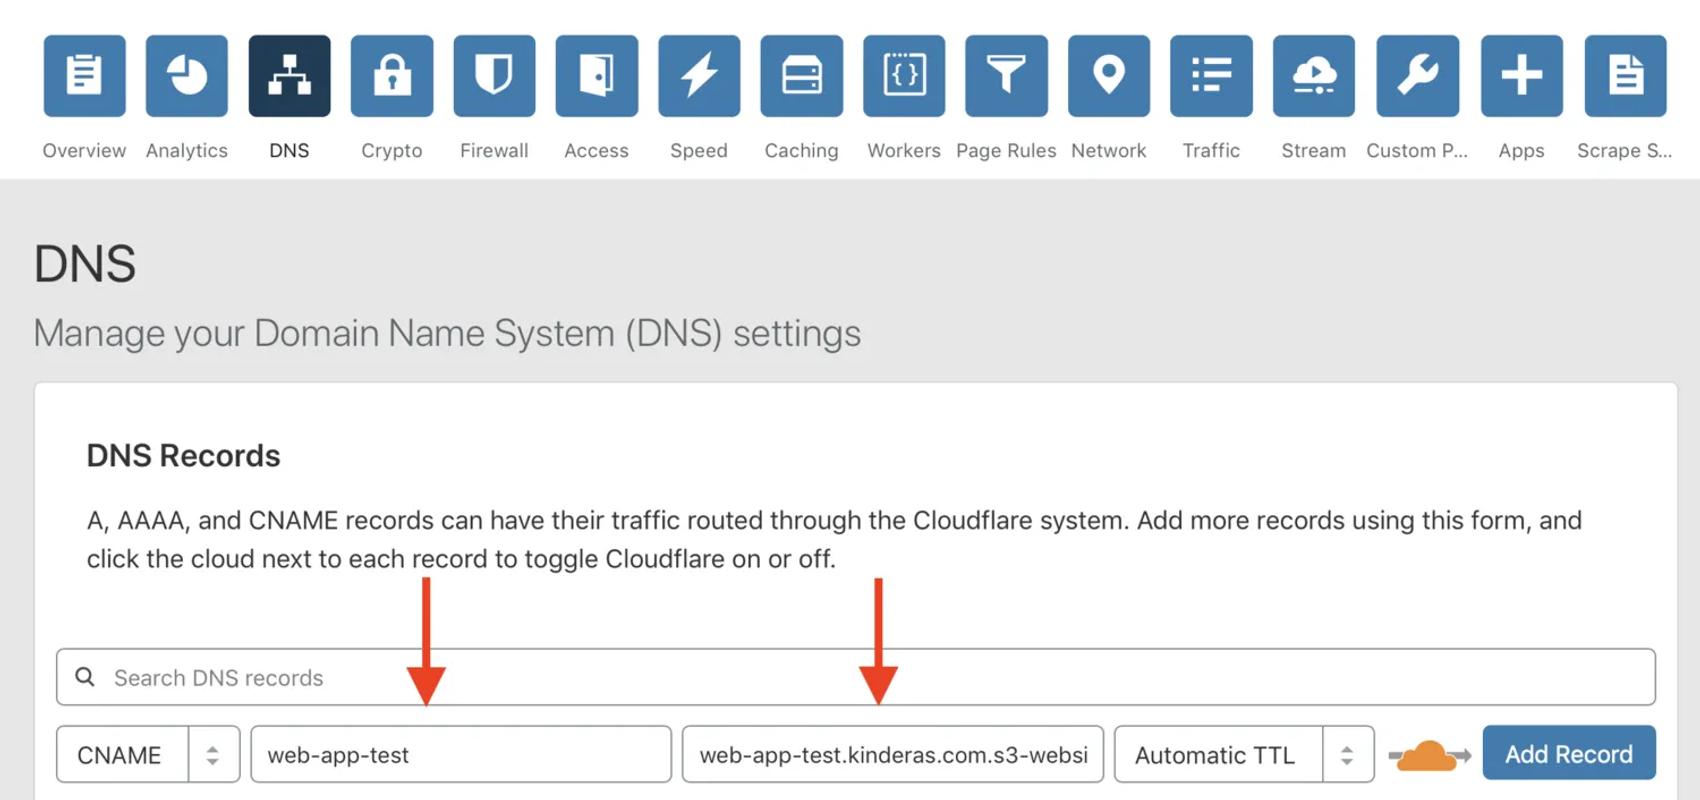
Log in to Cloudflare and navigate to the DNS tab. You'll need the URL from the static website dialog in the S3 setup section.
Add a new CNAME record. In this example, I'm using a subdomain so I'll add «web-app-test» for the «Name» field and then the URL (without http://) from the static website dialog in the S3 setup in the «Domain» field. Leave the little orange cloud on. Click «Add record».
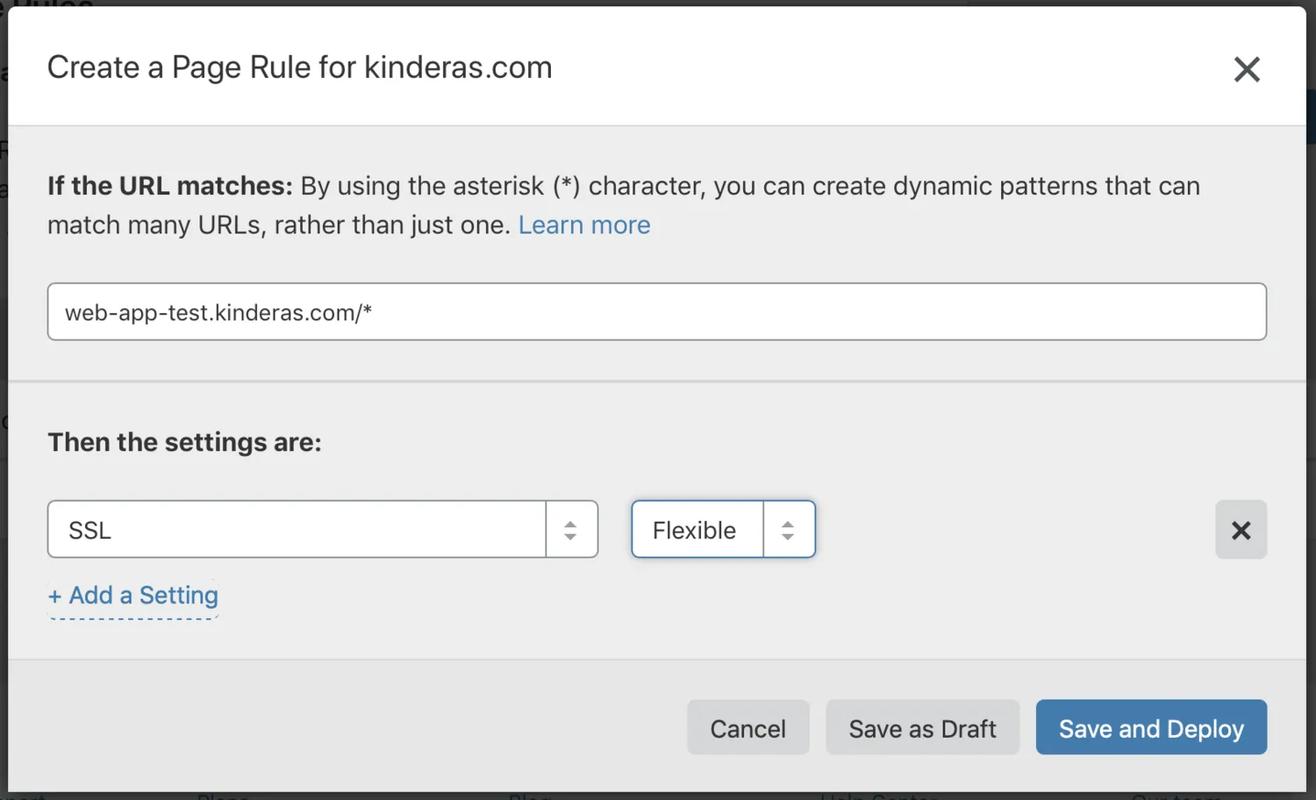
If you have the Crypto -> SSL section of Cloudflare set to "Full" you'll need to take an additional step. If it's set to "Flexible" you are done and the URL should work. Please don't change this setting in the SSL tab to Flexible if it’s set to Full, doing this will affect your entire domain!
[Optional - see above]. In Cloudflare, go to «Page Rules» and create a new rule. The rule should state that when a request to the web-app is encountered it should use "Flexible" SSL. See the image below for how this applies to the example URL.
You can now test your web-app at the proper URL, for this example that would be https://web-app-test.kinderas.com
Sources
- Cloudflare IP rages - https://www.cloudflare.com/ips/
- Hosting a web-site using Amazon S3 by Mike Tabor